Sunday 22 May 2016

Frostgrave / Mordheim Terrain #3

Going to call this done - mainly as I have a 'rest of the city' to build. Given the necessity to allow access to the buildings to move minis around I guess I can live with the realism/playability trade off. Was a fun project, took a lot longer than I had originally anticipated but now have a much better handle on what I should be doing. A couple more smaller buildings and that should hopefully be enough to start gaming on.


Sunday 17 April 2016

Frostgrave / Mordheim Terrain #2

More work in progress shots. Walls up and work on wooden beams commenced...


Monday 28 March 2016

Frostgrave / Mordheim Terrain

I kept hearing how good a game Frostgrave is so decided to get the book and check it out. The rules are simple and solid, and that, along with the campaign system, is part of the appeal of the game. It also looked like a great opportunity to try painting up small groups of miniatures without the need to monotonously paint the same model 40 times as with large scale fantasy games. Sounds great in theory, but what nobody warned me about was you suddenly feel inspired to go on an epic terrain-making bender. So with that in mind I rolled up my sleeves, broke out the foamcore and coffee stirrers and got started.

I wanted to start with a set of attached ruined buildings that the minis could interact with. I liked the idea of skirmishing warbands pursuing one another in and through the ruins. As I am also aiming for a modular gaming table at different elevations I wanted the terrain to pull double duty allowing for access between the ground level and first floors of the terrain I would later be making.Finally, as the terrain was likely to be used in a variety of gaming systems in a number of settings (fantasy, medieval, pirates, steampunk, possibly WWII) it had to look generic enough to slot in to any of those periods. Not fussy am I?...

Here's what I came up with:


Four connected townhouses. Left to right; First house to have a set of stairs up on the left side. First and second houses to have a connecting walkway above the stairs. The stairs would lead to a door on the second house and provide access to the terraced terrain when required. Third house would have access to the second house due to ruined connecting walls, and fourth house via a doorway. Additionally it would have access to the downstairs area which was the only ground floor area not made of solid foam. Fourth building would have access to the top floor via an external stairway on a balcony on the right hand side of the building. Sorted :)


Carved green foam glued on to light card to connect the components. Stairs between the first and second buildings. And greenstuff door fixtures because I'm yet to work out a better method...


Basement/ground floor of the third building, with internal stairs to the second floor.


The foam was undercoated in black paint and I did a quick drybrush on the stone stairs and the basement of building 3, as it was going to be difficult to reach once the next floor was attached.


Ground floor doorway to the 3rd building.


A couple of shots of the 3rd building ground floor after a quick coat of paint. The great thing about these shots is they show all the overstepping on the paint that I didn't see under normal light <_<


Floor on the next level (one piece of foamcore to try and add some rigidity) and start of the walls on building 1. Progress is proving to be a lot slower than I had anticipated but it's proving to be good fun :)

Sunday 6 March 2016

Perry Miniatures Light Cavalry as Proxy Bretonnian Mounted Yeoman

Needed some practice trying some new techniques for painting horses so picked up a box of Perry Minis 1400-1500 light cavalry. Kit was awesome - 12 mounted warriors with horses and bases and a slew of weapons options. Easy to take off the sprue, not much clean-up and assembles well.


Was only really interested in the horses so the paint on the riders was just to fill them in. Had thought of using these as proxies for Bretonnian Mounted Yeoman, as a unit of these guys is the same price as a single GW blister. While they are 28mm they do not appear to be 'heroic' 28mm and thus the height and volume are appreciably different to their GW equivalents. Photographed next to an Elleryan reaver for a scale comparison (as it was the smallest GW cavalry model I had to hand...).


Please note the smaller (20mm) bases on the Perry minis, and note that these are much flatter than the elevated GW ones. I have built up the bases on the Perry Minis a little with greenstuff so this may help offset the height difference, but there is still a noticeable difference in volume between the two pieces. If I was starting a Brett army I'd be tempted to look at proxying the whole thing with Perry Minis, but that's just me. A couple of these guys out on your flanks certainly shouldn't detract from the sight of the massed ranks of shiny GW Grail Knights and Pegasus Riders :)

Scratch Built Stone and Half Timber House

An additional practice run making scratch built buildings for Warhammern, Mordheim  and Frostgrave. I need to work out a more efficient way to do the roofing - it takes more time than the rest of the build...


Works ok as a test piece, my main issue was painting parts as I went - should have done all of the assembly then sat and painted the thing in one go. Lesson learned for next time round...

Friday 1 January 2016

Robotech Tactics RPG Painting Progress

So, team effort on this one. We got the kickstarter in hand in April 2015. So far have 2 units done on the UEDF side and less than a third of the battlepods done for the Zentradi. Based on the current rate of progress we could be at this for a while... Or at least until Wave 2 arrives.


Grinding through painting the pods feels like hard work, so very much not on my 'A' game as far as painting quality is concerned. But we are just going for a 'tabletop' quality standard so I guess that's OK.


Still unsure what to do about the bases. Painting plain grey might be the best compromise for units that could theoretically be active in cities, fields, forests, space, atmospheric dogfights, moons/asteroids, on spaceships or plain and simple post-apocalyptic wastelands.

Ruined Hamlet and Scratch Built Terrain

Have been working on terrain on and off again for a bit, have now managed to round out two boxes of the Ruined Hamlet from Warlord Games. Each box contains three identical 'kits' which can make a large and small building, or be combined in to one more aesthetically interesting piece. I was going for quantity over creativity, so managed to get 11 buildings out of the two kits.


First building I assembled (bottom left) I had a larger than building sized base, but quickly worked out that limited how I could use the building (i.e. putting it on a rural themed base meant it would not work on a cobblestone board in a city type game like Mordheim) so from then on I tried to get the bases to more closely fit the buildings themselves, filling any overhang with rubble.

Buildings were assembled and glued directly on to the base. Wooden floorings were made of coffee stirrers, aquarium gravel glued down for rubble/scatter and then the whole building was undercoated. I applied the pant fairly thick in order to texture the walls a little, then once dried sprayed the model with Plastic Soldier's Dirt Brown weathering spray. A quick retouch of the colours here and there and gluing down a garnish of Amy Painter's summer undergrowth and poison ivy and I called them done. Will need a few more walls etc then I should be able to fill out a ruined city.

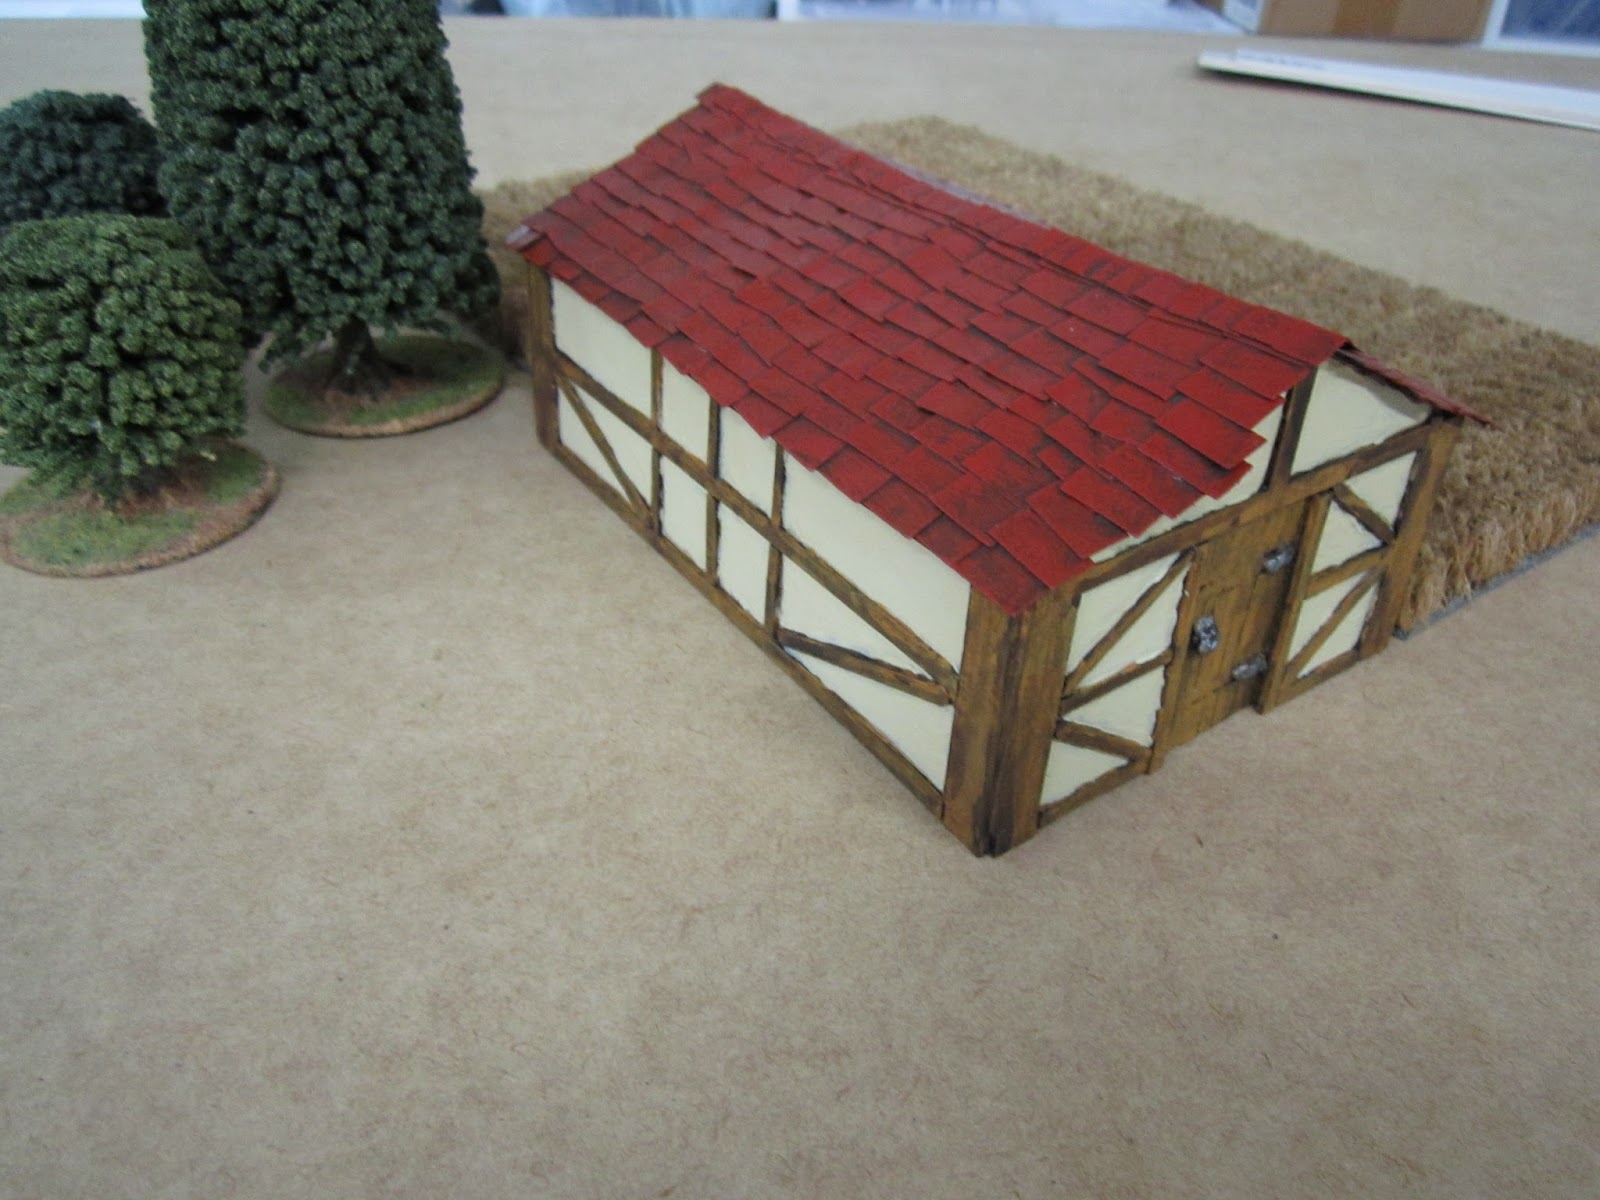
Next up was a 'proof of concept' half timber scratchbuilt building made from foamcore, balsa and cardboard. Wanted to start with something simple to learn what I was doing before trying anything more elaborate.


End result looked OK for a test piece. Take away points were as follows:
- Need to remember to cut the foamcore at as close to a right angle as possible so that there is a larger surface area in contact when gluing walls etc together.
- It's probably easier to texture the walls prior to undercoating rather than to use paint to texture at the end.
- Needs windows. And detailing.
- Roof tiles look OK but I think the rows on the edges should be made from thicker card to provide more of a sense of depth.
- I need to slow down when painting to avoid overstepping on tho the timber (need to use something with more of a point than what I use for terrain brushes usually).
- Some more practice with greenstuff probably wouldn't hurt either.
- Half the time was spent doing the roof tiles, so should have those cut out in advance and ready to glue down next time.


Warhammer Fantasy 8th ed 4000 Point Game

So, turns out these little figures aren't just for collecting and painting...

Had my first game of WHFB in more years than I care to admit. Just for crits and giggles we decided to try a 4,000 point game on an 8x4 foot board. From setup to completion took about 7 hours. Good fun though.

Am usually somewhat averse to playing with naked minis, but given the scale of this game we both had a couple of units that were just assembled or undercoated, and a few with highlighting, basing etc still needed.


Picture shows the glorious charge of the High Elves right flank. Which was shortly followed by the glorious collapse of the High Elves right flank...